Facebook Badge

Thursday, February 21, 2013

Rihanna's Grammys 2013 Inspired Makeup look! TUTORIAL!


So I know, everybody is talking about the Makeup look, the beautiful Rihanna was sporting a couple of weeks ago on the red carpet at the Grammy Awards 2013. And how can we not??, She looked soooo gorgeous, just completely flawless and not just the makeup itself, i mean her overall look was just amazing! That immaculate Gown was to die for, for sure!

Anyway, she inspired me to come out with a ;look inspired by what she was wearing, although I did changed it up a bit. Just to make it match a little better with my skin color and under tones, as well as for it to fit my eye shape.
Ok, so with no more talkity talk talk talk (LOL), here I'll leave you guys a video tutorial in: How to get the look and featuring the products I used.

Hope you guys like it!
Don't forget to subscribe and ill see you in the next Vid/BLog.
xoxox
-Mile.


Friday, February 15, 2013

How to: 5 Easy Steps to Perfect Eyebrows TUTORIAL


Eyebrows are one of the most important part of a successful  makeup, since they are frame of your eyes. No matter how great your eye shadow or foundation application is, your eyebrows have the power of either make or brake you whole makeup look. So today I decided to share a  very easy and fast  step by step of: How I do my Eyebrows.

Let's Get started:

1) The first thing I do is: Comb my brows.


2) I grab either a brow pencil or a brown gel liner. (Never use black, no matter how dark your hair might be) Then starting on the base of the brow and leaving about a 1/4 free of color in the inner corner, I go ahead a draw the arch of it. (Follow figure A.)
After that i basically do the same at the top. Making sure that i don't outline the eyebrow, since i'm not trying to make them thicker, I just want to define them. (Follow Figure B)


3) Then I go ahead and comb my eyebrow through, this step will help me blend any harsh lines (follow fig. A).
Next I take my favorite brow kit (E.L.F Eyebrow Kit in medium) and only using the powder part of it, I apply it all over my brows  (Including that first 1/4 in which I did not put any product earlier) with the help of an angle brush. (Follow fig. B). after that i comb them once again. 

4) For this step I use a synthetic brush and my glamouflage concealer from Hard Candy to outline my brow (top and base of it - Follow fig. A and B) This step is going to get rid of any mistakes I might have done and it will also help me shape them to my liking at the same time as it highlights my eyes.Last but not least: Blend, Blend, Blend!! (Fig. C)


5) The final result... defined yet soft looking brows!!


Hope you guys found this tutorial helpful! Don't forget to Subscribe! and also leave a comment below about your personal tips on how you get your eyebrows looking great? !!
Xoxox
-Mile.


Sunday, February 10, 2013

Kiss Nail Dress Kit REVIEW

If you guys have been following me in my other networks for a while, you would know how much into Makeup and Nails i am but as a Mom of a toddler myself, I no longer have the time to religiously do my nails and toes anymore. I mean, don't get me wrong, i still do it here and there but not like i used to. Now is more of a : well if I can squeeze in this week great and  if not, that's fine too.
well a couple of weeks ago i received a Kiss Nail Dress Kit in the mail, thanks to Influenster.
So Of course i was pretty excited as soon as i saw them inside of my Holiday VoxBox.

Anyway... A few days later i was ready to give them a try.


The ones i got were the: KDS03WG ( i know, there's no names. :(  just This looooong codes!

When you first open up the box you will find three sheets of nail decals with 28 strips in 14 different sizes, you might be wondering 14 sizes??? what for?? and well that's just to make sure you will be able to match them up with your nails perfectly, you will also find a small file to help you smooth out and shape the edges of your nail stickers,  and last but not least: A little booklet with instructions, tips and all the other designs available.


As for the application steps, they are basically the same as the polish strips; You place the sticker on your finger-nail or toe-nail, pressing down on it and smoothing out any wrinkles or bubbles if any, folding down the strip and then just buffing off whatever is left of it. Although this last step seems to be a bit harder for the Kiss Nail Dress, since they are so thick (compared to the polish strips) and specially if the design you chose had rhinestones in it.


The Strips themselves were made out of some sort of plastic like material, really thick and hard to rip.
The downside to that is: that if you look at them up close, you would definitely be able to tell that these are in fact stickers. But i mean there really is not that much room to complaint, being that they do deliver a nice Mani/Pedi in within minutes, for the fraction of the price (as  they go for only $6.99 USD ) , no waiting for polish to dry, Oh! and when you are ready for something new on your nails, you just peel them off! That's right! no nail polish remover is needed!

They do stick pretty well on their own, but after a few days of wear they start to lift up around the edges.

And of course, before i go... Here is a pic of my mani! 


I hope you guys found this review helpful, thank you so much for stopping by and don't forget to Subscribe!!
Xoxox
-Mile.


Saturday, February 9, 2013

Montagne Jeunesse Chocolate Masque Review

Today i decided to finally give a try to the Montagne Jeunesse Chocolate Masque, that i received in the Holidady VoxBox from Influenster.
I have tried many of their masks in the past but never really gotten a hold of this particular one.
When I opened up the sachet, the first thing that hit me was how incredibly good it smelled, i just wanted to eat it!!! Not just did it smelled like chocolate, it also looked like it! Yum!
 

I squeezed out some of it and applied it onto my face. It went on really smoothly but you kinda have to work it quickly, thru out your whole face, because it does starts to dry out pretty fast. 
I left it on for about a half an hour, until it was completely dry.
Anyway... I rinsed off the mask with warm water and the help of a washcloth and once it was completely off i went a head i gave myself a splash of cold water. One more time Montagne Jeunesse did not disappointed me I could definitely tell my face was looking and feeling great, it was very soft and fresh, my pores got a bit smaller, flakiness was also gone and my face was definitely glowy, I felt like those girls in the skincare commercials,  hahahaha.


Not bad for a mask that is less than $2 USD! If you ask me.
And just a little secret in between us: I can never find myself to use a whole sachet in just one application, so next week my skin will be receiving another doses of chocolate goodness! yay!

Thank you so much for stopping by, do not forget to Subscribe so you don't miss any of my updates.
xoxox
-Mile.


,


Easy Valentine's Day Makeup **Look of the Day** (LOTD)


Today's look was pretty, soft and inspired by Valentine's Day. i kept the eyes simple yet dressy  (The miracles that  Cat-Eyes do!) and went for a more of  a bold lip.  
I consider this to be a girly and very sultry look, and i actually love the fact that with  just changing the lip color you can wear it as a night or a day time makeup. 


Products used:
Eyes:
  • Eye lid and browbone : MAC Veluxe Pearl
  • Crease: Jujubeads Cosmetics Espresso.
  • Eyeliner: ELF Liquid Liner.
  • Mascara: Maybelline, The colossal Volum' Express Waterproof. 
Lips:
  • Sleek Pout Paint in Rosette. 
Face:
  • Foundation:  BeautiControl Tight, Firm & Fill.
                       Jujubeads Cosmetics Mineral Foundation.
  • Concealer: Laura Gueller The Real Deal Concealer.
  • Brozer/Contour:  ELF Bronzing and blushing Duo.
  • Blush:  ELF Mineral line blush in Peachy.
  • Eyebrows:  ELF Eyebrow Kit in Medium.


    Hope you guys liked my Look.
    thank you so much for stopping by, dont forget to Subscribe!! :)
    Xoxox
    -Mile!


Friday, February 8, 2013

Shoes Shoes and more Shoes. SoleSociety.Com / Giveaway


A couple of months ago, I was introduce to a company named Sole Society thru Influenster.com.
They sell one of the things that I am more obsess about: SHOES! 
They are actually one of those membership on which you get amazing shoes for a reasonable price. And not just that but they actually also offer a section on their website called "Insider Picks"
where you get to see professional stylists put together whole outfits and such, so more than just shopping is also very a instructive and helpful experience, specially if you are a newbie at the moment of combining clothing pieces.


Anyway, they have shoes in every single style there is, from flats to pumps, boots to sandals, wedges... Really they just have a very versatile selection.


They also have a "Magazine" tab where you get the last scoop of what is trending  at the moment.


And a "My Closet" feature where you can save your favorite picks and easily go back to them without having to search the whole site all over again. (thumbs up for that!)
All the shoes go from $49.95 to $59.95 but if you head over and sigh up you will  receive a 20% off your first pair of shoes!. And you also receive free shipping both ways (unlimited)


Now to end this post in an awesome way, here is a Giveaway that Sole Society is hosting at the moment!


Entering the Like it to Win it GIVEAWAY is pretty simple, all you do is go to their website and click on the giveaway ( you must sign in to be able to do this) on their homepage, enter your email, and then another screen will appear, in which you will see the three easy steps: 1) LIKE their Facebook page, 2) Share the giveaway, 3) click the tab to redeem a $10 Coupon . and that is it, you'll be entered to win one of their most popular pair of shoes plus $500 in store credit! 
**Good Luck My Loves**


Thursday, February 7, 2013

DIY: Easy Avocado, Olive Oil and Honey Hair Mask!


Today we are going to be making a hydrating hair Mask for thirsty, damaged, dry hair.
Hope you guys enjoy, and you do decide to make this recipe, don't forget to snap a pic for me and share it on my Facebook Page <--- or hash tag me on twitter and instagram at #MakeupByMile.

Thank you so much for stopping by, don't forget to subscribe
Xoxox
-Mile.


Monday, February 4, 2013

Quaker Real Medleys in Peach Almond Oatmeal REVIEW


First of all i should start by saying: i love oatmeal and so does my little toddler, Its just one of those things that no matter what... you can always find it in my pantry, not just is it better and healthier for you but it also gives you the freedom to pretty much add anything you could possibly think of to make it tastier!
That  being said let's go onto a product i came across thanks to Influenster, like i said in my previous post i received the Holiday VoxBox 2012 and one of the goodies i got in it was the Quaker Real Medleys in Peach Almond Oatmeal. So of course my first thought when i saw it was: YUM!
It came (Yes, past tense. Because is looong gone. LOL)  in an individual 2.64 OZ / 75 g serving cup, perfect for on the go.


When i first opened up the container i was surprised by how big the grains were and one thing i liked about the Real Medleys was that it wasn't just Oats like most instant oatmeal in the market,  it also had Rye, Barley and wheat. And to top it up a notch It also had little chunks of almonds and peach.
It smelled really good, almost honey like... Which is weird because there is no honey in there!


The directions to prepare it were really simple: All you do is remove the lid and seal, fill it up to the dark line with either boiling or cold water (depending of whether you are thinking on microwaving it or not), Although i chose to add milk to mine instead ( i just like it better that way), then i stirred it up and popped  it in the MW for 45 secs, the time specified in the cup but it didn't work out too well, the oatmeal was still watery, so then i figured that water and milk probably have different boiling points, which in fact milk's boiling point is a few degrees higher than that of the water. So i just microwaved it for a few secs more and guess what happened then??? Well of course this time it was a bit too thick for my liking, so i had to add a little bit more of milk and  it was ready for me to finally try it!


As you guys can probably imagine; By the time I was about to take my first taste of it, my expectations were pretty high!

No makeup and Robe on! #Sorryinnotsorry status! lol

Well... what can i say: it didn't disappointed me, I loved it!!  The crunchiness from the almonds and all the  different grains made of this oatmeal the best i have ever tried (aside from my mom's special recipe), i have seen lots of reviews complaining about it not being sweet enough but going thru the nutritional chart i found it has 19g. of sugars which in my book seems like an awful lot but for some crazy reason it just doesn't taste as sweet as you would imagine, for me it was just right, specially since there was fruit in it. you definitely do not want the sweetness of the oatmeal competing with the sweetness in the fruit.
As for calories it says it has 290 per cup, which also seems high to me but looking at everything that's in it, it must come from the almonds.


One thing about it though is that it can get pricey, it goes for $1.79 per cup where as the Quaker Instant oatmeal pack of 18 goes for under $6 (it might depend on the flavor though). And me not being in a schedule Aka: not having somewhere to be every morning  , i think i'd only buy this for special occasions like: Camping, traveling, or something like that. although i can totally see myself buying then here and there just to spice up my mornings with something different.

Anyway... i hope you guys found my Review helpful.
Thank you so much for stopping by and dont forget to subscribe so you don't miss out on my updates!
Xoxox
-Mile.


Disclaimer:
This product was sent to me completely free via Influenster.
And i vowed to have given my 100% honest opinion.


Saturday, February 2, 2013

EBOOST Natural Energy Review!

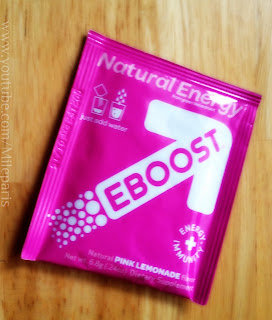
Earlier this month after a very long wait, i finally got in the mail my Influenster Holiday Voxbox 2012, and one of the goodies i found inside was an EBOOST sample .


I was inmediadtly excited  since i am very into all this type of water enhancer powders.
I am also very curious/cautious about the stuff that i drink/eat/wear. so i went a head a did my own research to see exactly what i was getting myself into before i even tried it...
Well i found out that not just is an all natural product but that it also offers a bit more than any other product of this kind in the market at the moment! They claim to have goodies as:  Vitamin B-12, Vitamin c, Vitamin D, Green tea, Acid Folic (that has so many benefits), Quercetin, 5-HTP, Resveratrol, huperzine-A, among other things all compacted into one little envelope! I also found that the EBOOST is sweeten with Stevia  which is a plant not a chemical! and that its Gluten and Soy Free!
Anyway... it comes in two presentations: As an easy to mix powder and as a shot. And in four different flavors:  Orange, Pink Lemonade, Acai Pomegranate and Super Berry.

Ok, now... lets go on to my personal experience:
I purred my Pink Lemonade mix into a 12Oz. glass and let it sit for a few seconds to allow it to effervesce,


and then i also added a couple of ice cubes, just so it was chilled, because i am not a big fan of room temperature drinks. ( but i guess that its really up to your personal choice).
Make sure you also stir it up, to make sure the powder is completely dissolved into the water, before you start drinking it.


 The first thing in my mind as i took the first sip was: " Wow!! this thing tastes great!!". It was seriously just like having a real lemonade, way better tasting that those fake ones you get at restaurants and off course way better for you!. This doesn't happen very often where as the stuff that's good for you tastes better than the junk! and it totally comes from EBOOST not having any artificial flavors added!
Sugar wise, in my opinion it was sweeten perfectly , it was a happy medium, not too much to be overwhelming or too little to be too tangy or bitter.


Excuse my washed out face. (No makeup for this girl this morning! :)

It took about 15 minutes for me to start feeling more energized! I can totally see how this would help you not just in your regular life to keep up with the busy days but as a way to keep your workout on point and just make it easier and more enjoyable for yourself. I was literally bouncing off the walls with my little one, we danced and chased each other all over the house! hahahha

But anyway before i get off topic, i'd like to say that this "boost" Lasted for about four hours, and then i started to slow down, did not get sleepy, just simply started to be my old self, lol.

I think this would definitely be worth the investment, and when i say investment .. i mean it, since it can get a bit pricey if you plan in consume it on a daily basis. As it goes for $28 for a box of 20 ct. and $39 for a box of 30 ct. of the effervescent powders. Or $39 for a box of 12ct. shots!

The only thing i am not too crazy about is that it does contains Caffeine (which is what keeps you awake!)
But at the same time i think all the Minerals, Vitamins and super-Nutrients balanced out everything.

I can also see it being a huge help to reach my Workout goals, keeping my momentum everyday, in other words, giving me the energy to actually want to do it!

Overall, i think i would definitely purchase this in the future and not just that, but i would also recommend it to friends.
This puppy gets a 9 out of 10 Score, from me!

Once again, thank you so much for visiting my blog! dont forget to Subscribe up there, so you dont miss any of my updates!
Hope you enjoy the reading.
Big Kisses.
xxx
-Mile.

Disclaimer:
I got this product for free via Influenster.
and i vowed to give my 100% honest opinion.